How to: Create Patterns
Here’s how you can create your own patterns. I can’t wait for your designs to come to life!
I love creating pattens using pressed flowers or paintings from my garden to make textile and wallpaper designs.
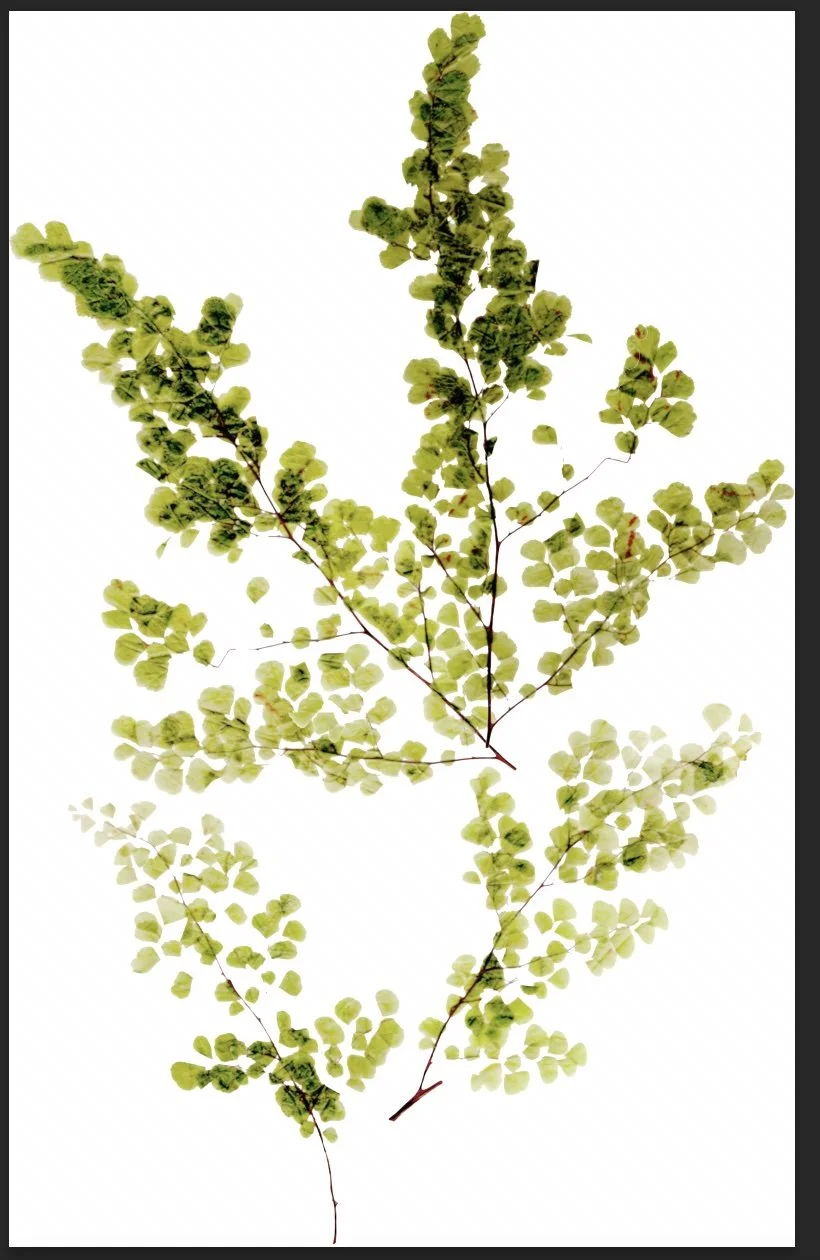
Start with a scan.
Scan your artwork at 300 dpi. Be sure to clean up any smudges or dust.

2. Cut your image horizontally.
Slice your image across the middle, and “cut” it in half. Be sure to use “command X” so you can paste the cut piece later.
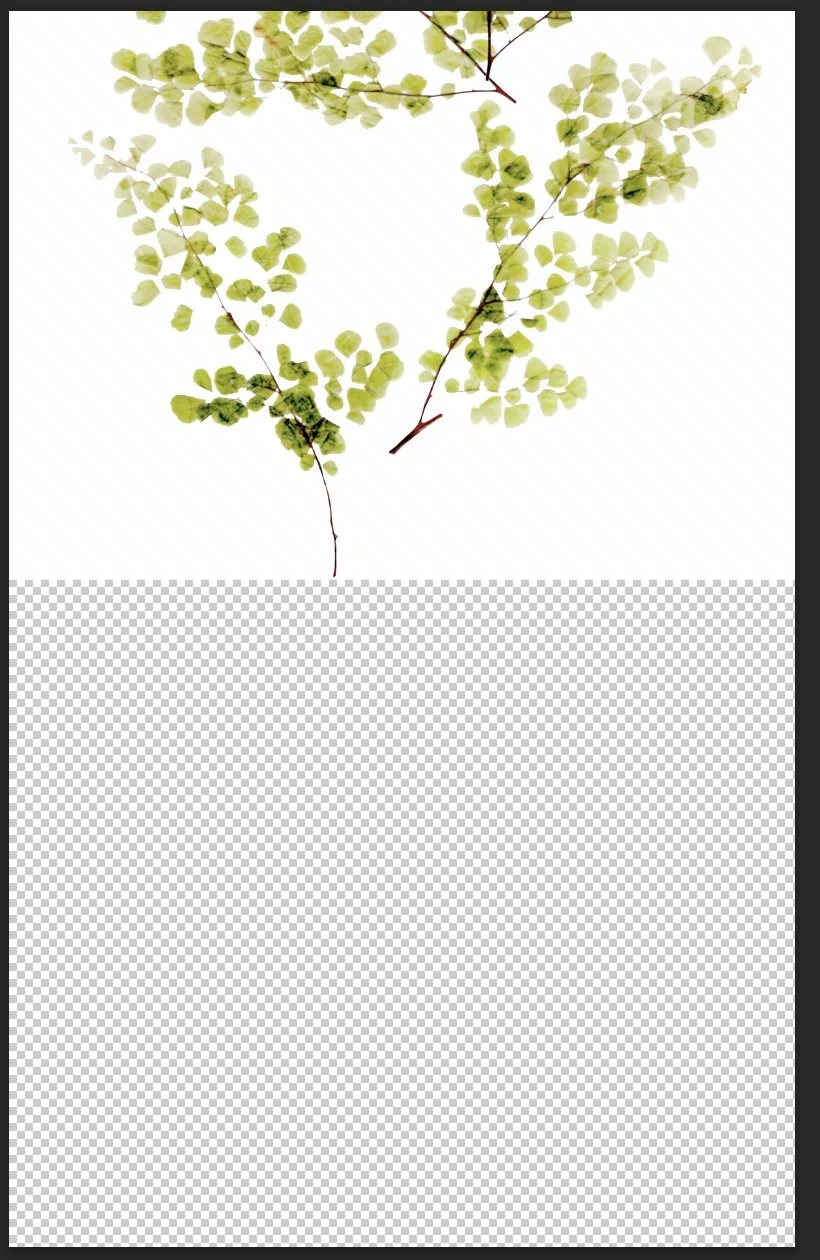
3. Move the bottom of your image to the top.
Be sure to line it up exactly, leaving no line at the top.

4. Paste the top of your image to the bottom.
Again, be sure to line it up exactly.
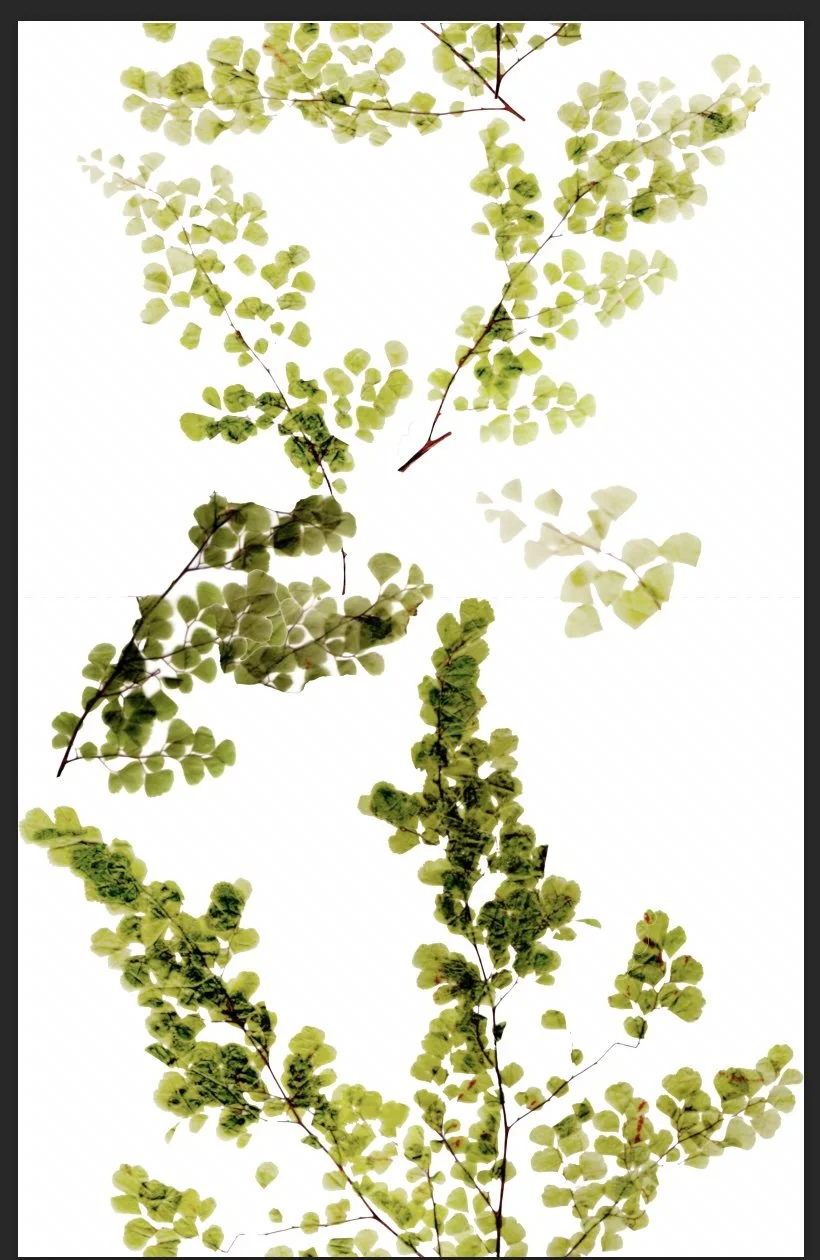
5. Add elements to increase interest.
Look at the design. Where is it boring or empty? Add more elements where needed. Flatten the image (merge the layers) before proceeding to the next step.

6. Cut vertically.
Be sure to use the “ctrl X” command, so you can paste your piece back in after the next step.
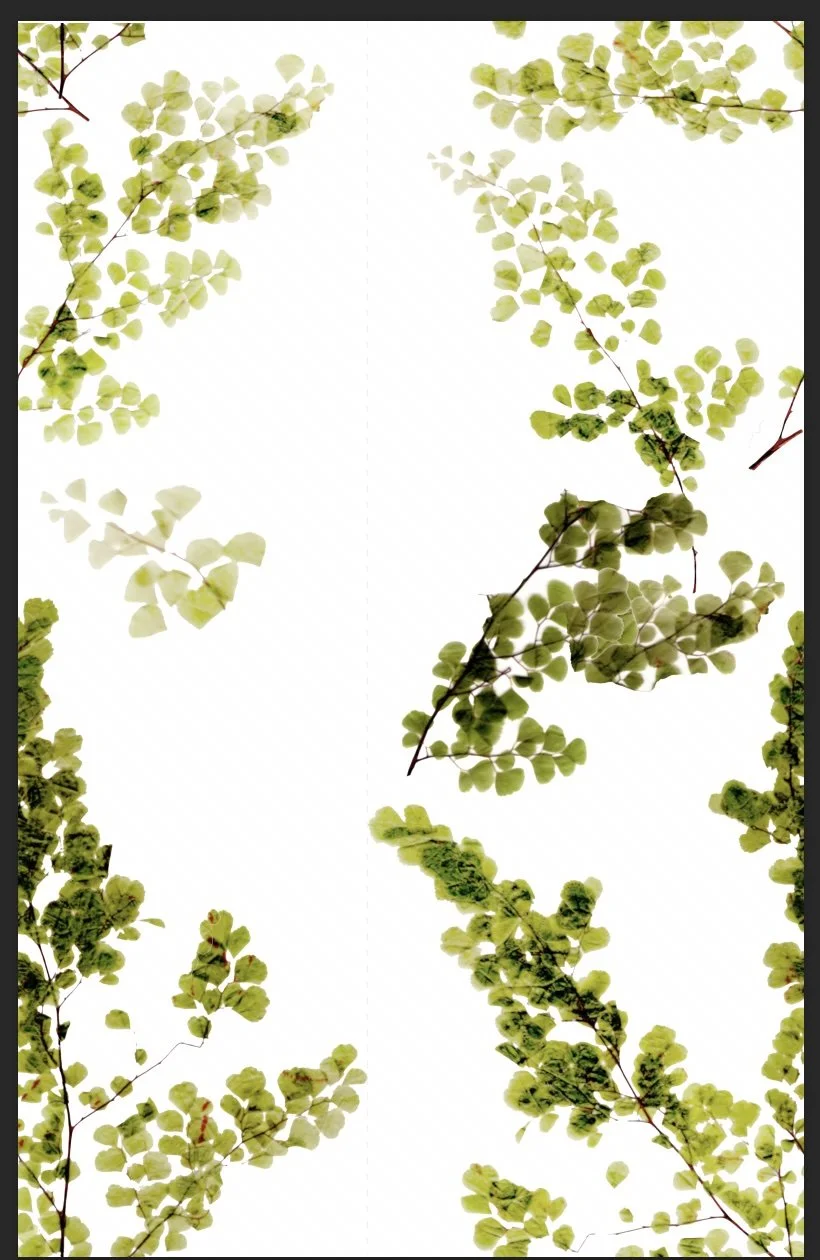
7. Move and paste.
Move the right side to the left, and paste the piece you cut on the right.
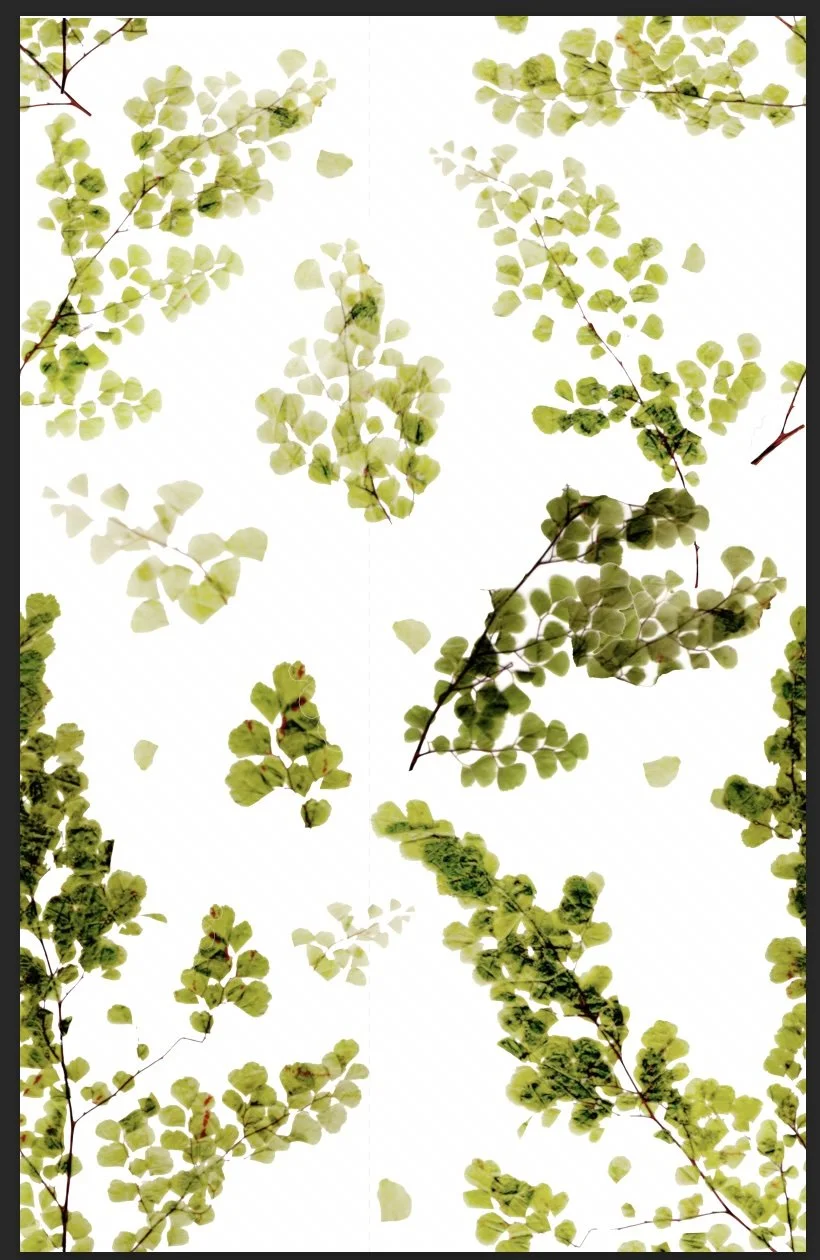
8. Add Elements for Interest
Add elements to make the design full and exciting.
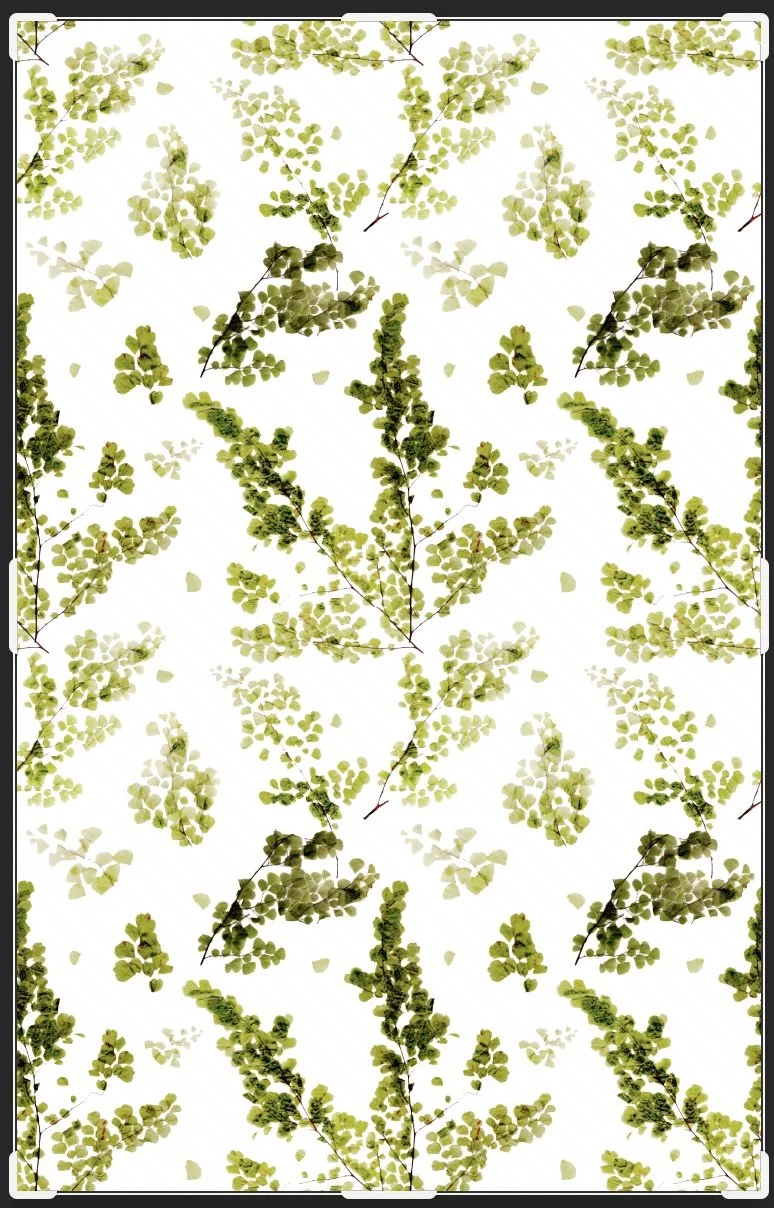
9. Test your pattern
Paste four copies of your pattern into a grid, lining each image up perfectly. Check the edges to ensure there are no lines and that everything aligns.

10. Create!
After creating this sample pattern, I fell in love with it. So, I added it to my shop. I enjoy using Threadless and Spoonflower. You can, too.